
Learn how to claim crypto airdrops safely without falling for scams. Follow this step-by-step guide to verify eligibility, use secure wallets, and claim rewards.
Crypto airdrops offer one of the most rewarding ways to accumulate free digital assets. When a protocol launches its native token, it often distributes a substantial supply directly to early users, testnet participants, and active community members as a reward for their support.
However, the excitement surrounding major token distributions also attracts sophisticated scammers deploying fake claim pages, malicious wallet-drainer scripts, and impersonation links. Knowing how to safely navigate, verify, and claim an airdrop is critical to protecting your digital assets.
This step-by-step guide walks you through the exact process of claiming legitimate crypto airdrops while avoiding common traps.
Step 1: Set Up a Secure “Burner” Wallet Infrastructure
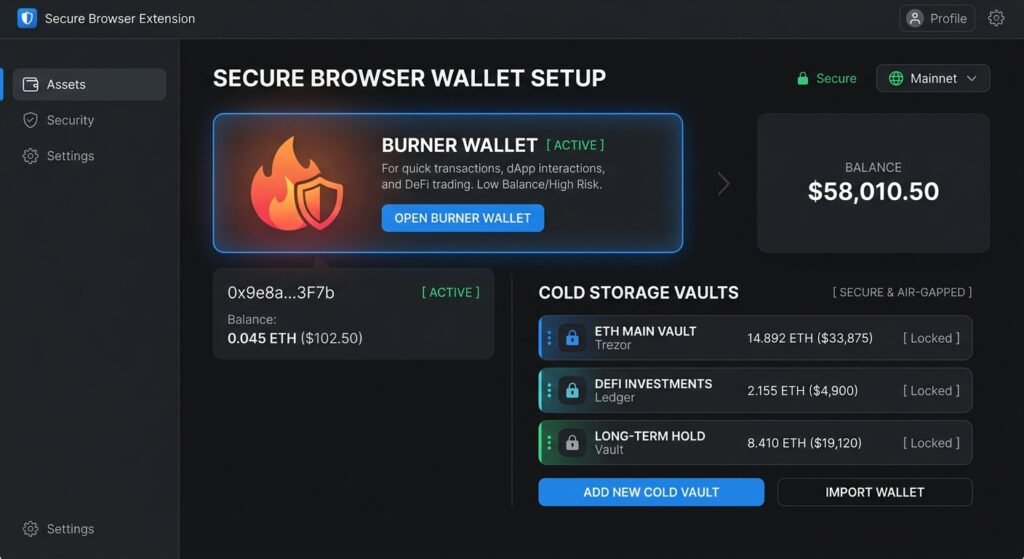
Never use your primary, long-term cold storage or savings wallet to interact with new airdrop claim pages or experimental dApps.
-
Create a Dedicated Wallet: Install a separate browser extension wallet (such as MetaMask, Rabby, or Phantom) specifically designated for airdrop hunting.
-
Keep Holdings Isolated: Only fund this burner wallet with enough native gas tokens (like ETH, SOL, or MATIC) to cover basic transaction fees for claiming your rewards.
Step 2: Source Verification (Avoid Phishing Traps)
The highest-risk moment in any airdrop is finding the link. Scammers frequently run sponsored search ads or post fake links on social media platforms mimicking official project accounts.
-
Cross-Check Official Channels: Retrieve project claim links exclusively from official project documentation, verified social handles (such as an official X account with verified badges), or trusted trackers like CoinGecko, CoinMarketCap, or Airdrops.io.
-
Inspect the URL Character-by-Character: Look out for subtle typos, extra hyphens, or fake domain extensions (e.g.,
.coinstead of.com, or substituting letters). Never click direct links sent via Telegram DMs or social media replies.
Step 3: Check Your Eligibility on the Official Portal
Once you have verified the authentic website link, navigate to the portal to check if your wallet qualifies.
-
Connect Your Wallet: Connect your burner wallet to the official platform interface.
-
Review Allocation Details: A genuine claim dashboard will display your exact token allocation, vesting schedules (if applicable), and the contract address of the token.
-
Verify Token Contract Address: Cross-reference the official token contract address shown on the claim page with the project’s official GitHub or documentation to ensure you aren’t interacting with a fake mimic token.
Step 4: Execute the Claim Transaction Safely
When you click “Claim,” your wallet will prompt you to sign a transaction. This step requires extreme vigilance:
-
Understand the Golden Rule: A real airdrop never asks you to send funds or pay a fee upfront to “unlock” or “activate” your reward. If a page demands a crypto deposit to release free tokens, it is a scam. You will only ever pay standard network gas fees.
-
Inspect Wallet Signature Pop-ups: Read the transaction request carefully. Ensure you are signing a standard token claim or smart contract interaction, not an open-ended
setApprovalForAllor malicious transfer permission that grants a third party access to sweep your entire wallet balance.
Step 5: Post-Claim Hygiene & Token Management
Once the transaction is confirmed and your tokens land in your wallet, complete these final maintenance steps:
-
Verify on Block Explorer: Copy your transaction hash and look it up on the relevant block explorer (such as Etherscan or Solscan) to confirm a successful transfer.
-
Revoke Unnecessary Contract Approvals: Use a trusted permission-checking tool (like Revoke.cash) to cut off smart contract spending allowances granted during the claim process.
-
Transfer to Secure Storage: If you plan on holding your claimed tokens long-term, transfer them out of your burner wallet into your main secure hardware storage wallet.
Airdrop Safety Checklist Overview
| Step | Action Item | Critical Safety Rule |
| 1. Infrastructure | Set up a clean browser wallet | Never use your main cold storage or savings wallet. |
| 2. Sourcing | Find the official claim link | Never click links from social media DMs or search engine ads. |
| 3. Verification | Check domain spelling & contracts | Confirm token contract addresses via official project docs. |
| 4. Claiming | Sign the network transaction | Never send crypto deposits or fees to “unlock” rewards. |
| 5. Cleanup | Revoke smart contract approvals | Revoke lingering permissions using a tool like Revoke.cash. |
Conclusion
Claiming crypto airdrops can be an exciting and rewarding part of participating in the Web3 ecosystem, but safety must always take priority over speed. By maintaining strict wallet hygiene, verifying every link against official project sources, and remembering that legitimate airdrops never require upfront deposits, you can capture token distributions while keeping your capital secure.